Inspire 1 Drone Parachute Installation Pictorial
This pictorial will help you install and rig the Inspire 1 Parachute Launcher. You can purchase the Inspire 1 Drone Parachute with SATS-MINI Failsafe here. Before starting make sure you have done the initial folding of the Iris parachute and install the parachute into the Skycat X48 Launcher. Refer to:
- How to Fold a Parachute - Follow this guide up to the beginning of Step 4, stopping after "fold the parachute canopy into thirds to create a long rectangle shape."
- Pack and Load the Skycat Drone Parachute Launcher
- Connecting Skycat Inspire Mount with the SATS-MINI - This photo album shows how to install the electronic parts into the Inspire copter equipment box. And then how to connect the failsafe to the Skycat trigger. NOTE: The Mayday has been replaced by the SATS-MINI, making the connection between the Skycat V3 trigger and the SATS-MINI simple. A video on how to test the failsafe is also included.
-
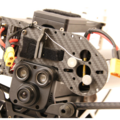
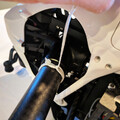
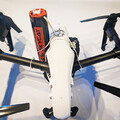
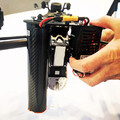 Step 1Before we start to load the Skycat X48 Launcher with the parachute. See the tutorial on packing and loading the Skycat Launcher: https://fruitychutes.com/help_for_parachutes/skycat-product-help/pack-and-load-the-skycat-drone-parachute-launcher The proper parachute is the IFC-48-SUL chute. After that we start with rigging by attaching the Inspire 1 Launcher board to the copter. With the copter upside down, slide the bound under the lip of the sensor pod. Tip the launcher up and align the launcher narrowed edge under the lip.
 -
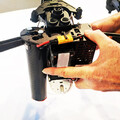 Step 2Then lower the mount flat with the underside of the battery holder. You may need to pull the battery cage out slightly to get it past the battery.
 -
 Step 3Next remove the battery so we can install the Velcro strap to hold the mount in place.
 -
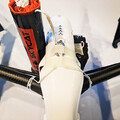
 Step 4The Velcro strap goes through the slots in the bottom center of the mount, and around the bottom of the battery holder.
 -
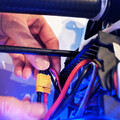
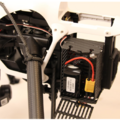
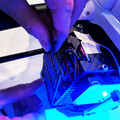
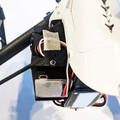 Step 5Now verify clearance of the props with the launcher. If you're using the Mayday Failsafe, a good spot to place it is near the top of the battery cage so that it will clear the props. Run the Servo wires out one of the holes in the top of the battery cage and connect to the Mayday. Be sure to tape the wires down to the top of the cage so they do not flop around and get into the props.
 -
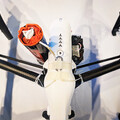
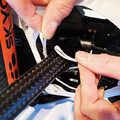 Step 6Now attach the short 6" Spectra harnesses. Hook each harness around the rotor booms.
 -
-

-
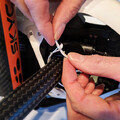
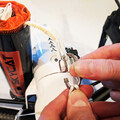
 Step 9Use a zip tie to secure the harness. Run the wire tie through the loop opening and over the spectra harness. This keeps it securely in place.
 -

-
-
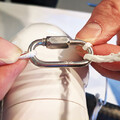
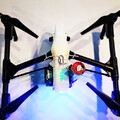
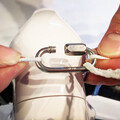 Step 12Bring each harness end up over the top of the copter body and hook the loops into the quick link. Also put the parachute shock cord coming out of the Skycat through the quick link. Make sure they are in order so there are no crosses.
 -
 Step 13Another view showing the parachute shock cord on the top of the quick link, and the harnesses on the bottom.
 -
-
-
 Step 16To keep everything in place use some masking tape to secure all the cordage.
 -
-
-
-